Learn how to bulk import contacts into Vault. Your file must be in CSV (Comma-Separated Values) format.
This article covers:
About bulk contact import
Bulk importing contacts saves time when adding large datasets to MRI Vault.
- Your file must be in CSV (Comma-Separated Values) format
- Ensure the first row contains header names
- CSV file must contain a contact first name column
You can also review the list of available data fields for import.
Import contacts
Before starting the import process, ensure you have all the necessary items ready. This includes preparing your CSV file, reviewing available data fields, and understanding the options for duplicate checks. Having these details in place will ensure a smooth and successful import.
Step 1: Prepare your CSV file
- Go to Contacts > Import
- If your data is in Excel, save it as CSV using the Save As option
- Confirm that the first row includes column headers (e.g., First Name, Last Name)
Step 2: Upload your CSV file
Once your file is ready:
- Click Choose File and select your CSV
- Assign access permissions (e.g., Everyone) and select marketing contacts if applicable
- Decide whether to enable duplicate check - Enabling this option ignores duplicates. We recommend managing duplicates after import using Vault tools
- Click Next
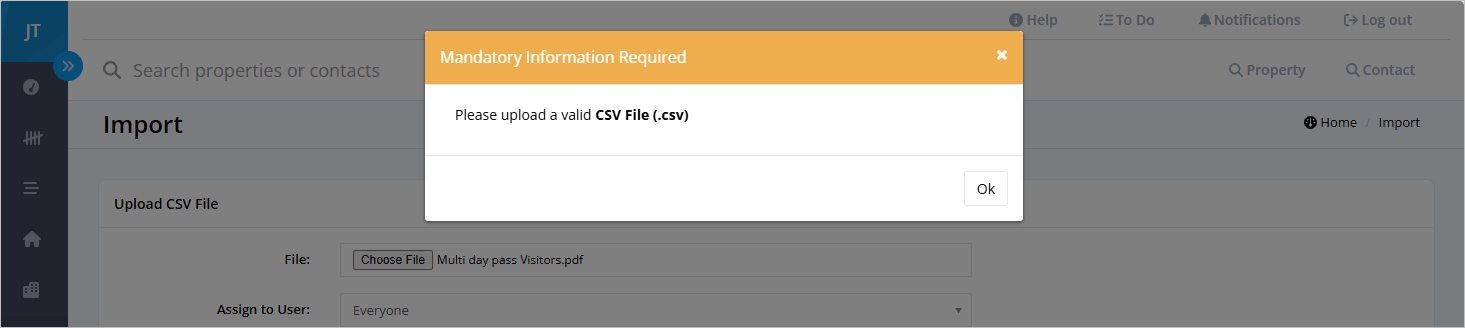
Note: Only CSV files can be imported. If you upload a file in an unsupported format, Vault will display an error message when you click Next, prompting you to upload a valid CSV file before you can continue.
Step 3: Match your fields
If headers don’t match Vault fields, you’ll see an error message. Fix your file before retrying.
Then:
- Match each CSV column to the corresponding Vault field (e.g., first name → First Name)
- Ignore any fields you don’t want to import
- Click Import Now
Note: If contacts are missing suburb or property details after an import, this usually means the address fields were not included or mapped correctly in the CSV file. Review your CSV and field mappings to ensure address information is imported as expected.
Step 4: Confirm your import
After clicking Import Now:
- You’ll see a confirmation screen showing your import is scheduled
- Once processed, contacts will appear in MRI Vault
- You’ll also receive an email confirming success
Note: You can delete or reverse an import within 48 hours via the import tool by clicking Delete next to the desired import.